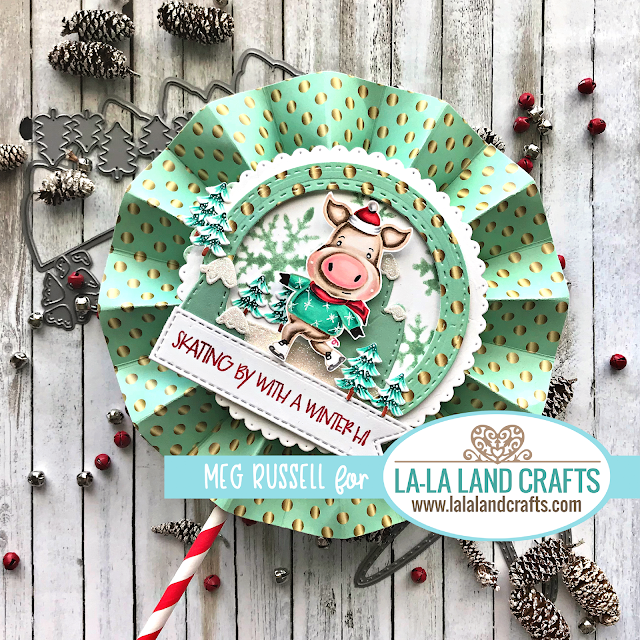
Winter Lollipop Tutorial
This lollipop holder is perfect as a card, or even as a gift itself! Don't forget to use a red-striped straw, it's the perfect accent piece!
PRODUCTS USED
COPIC COLORS
piggie - E44, 43, 42, 41, 40, R43, 21, 20, 11
red - R59, 29, 17, 14
sweater - BG49, 15, 34, 11, G12
trees – BG49, 34, E39
red - R59, 29, 17, 14
sweater - BG49, 15, 34, 11, G12
trees – BG49, 34, E39
PAPER CUTS & SCORING
Golden Sunset paper pack:
(4) - 3" x 6" pieces, using the green dotty paper
Score each each sheet at 7/8” (along the 6” side). This will yield 7 sections per piece (7th section will be a little small, this doesn't matter)
Red and White striped paper straw
~ now for the tutorial you have been waiting for ~
Fold up each piece accordion-style.
Place very good adhesive onto the 7th section of each sheet, and then glue sheets together.
The picture below shows what it will look like at this stage:
Set your circle aside.
Using the largest Pierced Scalloped Circles die, cut 2 out of white card stock.
Using mint green ink and the It's Snowing stencils, stencil snowflakes onto both scalloped circles.
Set aside.
Going back to your accordion fold circle, now you want to flatten it out.
To do this, push the centers of the circle in towards each other, and down, as in the picture below. It doesn't matter which pattern is facing you, whether the front or the back:
Use something to hold your lollipop down flat for a moment.
Using a glue gun, apply hot glue to the back of one of your scalloped circles, and adhere to the pinwheel. Make sure you press down firmly and hold for about 20 seconds.
After dry, then turn your pinwheel over and do the same thing.
Now it's time to work on your design.
Using white glitter paper, cut out the smaller Lakes die. Using the Mountains die, cut out the snow tops. Set aside.
Using mint green paper and the larger Lakes die, cut out a lake.
Then, cut down the lake so that you keep the narrow edges, about 2” (you're going to use them to be mountains).
Glue snow tops onto the “humps” of the lake and set aside.
Using the Mountains die, cut out the trees.
Color trees and set aside.
Using the largest Stitched Nested Circles die, cut one circle out of Golden Sunset design paper (I
used the same pattern that I used for my lollipop).
Using the 2nd largest Double Stitched Circles die, center die into the circle you just cut out, and die cut. This will leave you with a frame. Discard the rest.
Center the sparkly lake onto your scalloped circle frame as shown.
Before you glue down, arrange 1 tree and 1 mountain “hump” as shown.
Once you glue all that down, pop up the Golden Sunset frame you made on dimensional foam and glue into place.
Using the Winter Piggies clear stamps, stamp the sentiment in red ink.
Cut out the sentiment using the 2nd largest of the Long Flags dies.
Pop up on dimensional foam and adhere as shown.
Adhere two trees and the second mountain “hump” to the banner also using dimensional foam, as shown.
Using the Winter Piggies stamps, color and cut out the skating biggie.
Adhere to lollipop using 2 layers of dimensional foam.
Add your 2 remaining trees to the left of the card.
Glue down the first one, and put the second one onto dimensional foam.
The final step is to put a stick onto your lollipop card.
Using a glue gun, adhere a striped straw to the pinwheel.
You want to stick it underneath the scalloped circle you glued to the BACK of your project.
Make sure you center it too, so that your design is straight when you hold up your lollipop!


Comments
Post a Comment